Overview
Vecurity partners handle customer management and sales, while Vecurity manages the infrastructure, security, and APIs.
There are two ways to implement Vecurity:
- Iframe/Embed Integration – Quick setup with minimal coding.
- Custom Frontend Integration – Build your own app using Vecurity’s API-first VISE backend.
Step 1: Partner Account Setup
To get started, provide Vecurity with:
- Your company logo
- Your homepage URL
- Your payment URL
Once submitted, your Vecurity account manager will enable partner mode on your account.
Step 2: Configure Nameservers for Whitelabeling
Whitelabeling allows your customers to use Vecurity services under your brand.
Example: Company domain = secure.com
- ns1.secure.com → points to Vecurity infrastructure
- ns2.secure.com → points to Vecurity infrastructure
- dns.secure.com (A record) → points to Vecurity infrastructure
✅ Tip: Once these nameservers are set, any customer pointing their domain to them will automatically use your whitelabeled Vecurity services.
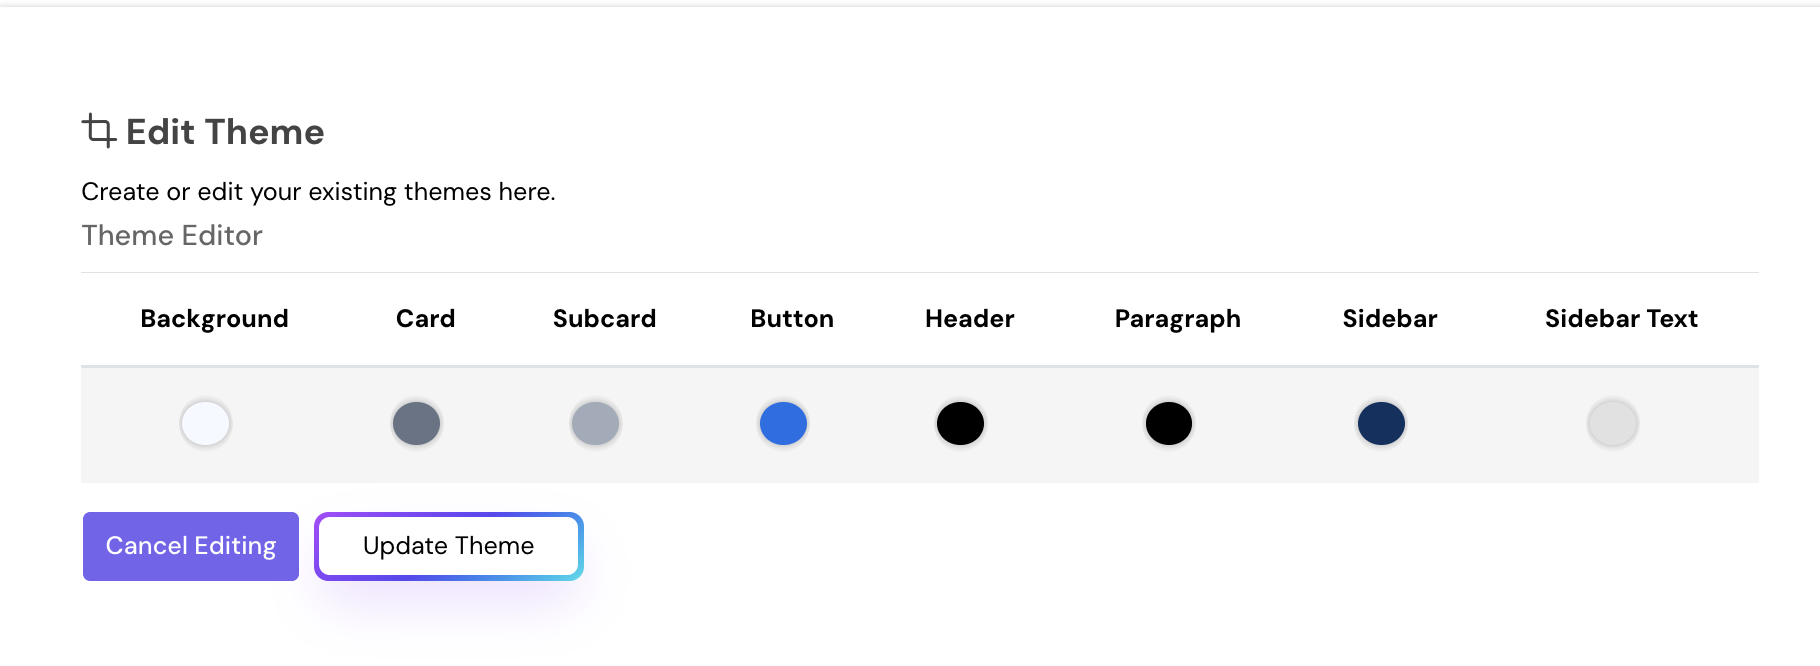
Step 3: Create a Theme
Create a theme for your partner account to maintain consistent branding for all your customers:
- Choose brand colors (e.g., Blue, White, Dark Grey)
- Apply it across all reseller services
Note: Themes ensure your customers see your branding instead of Vecurity’s.

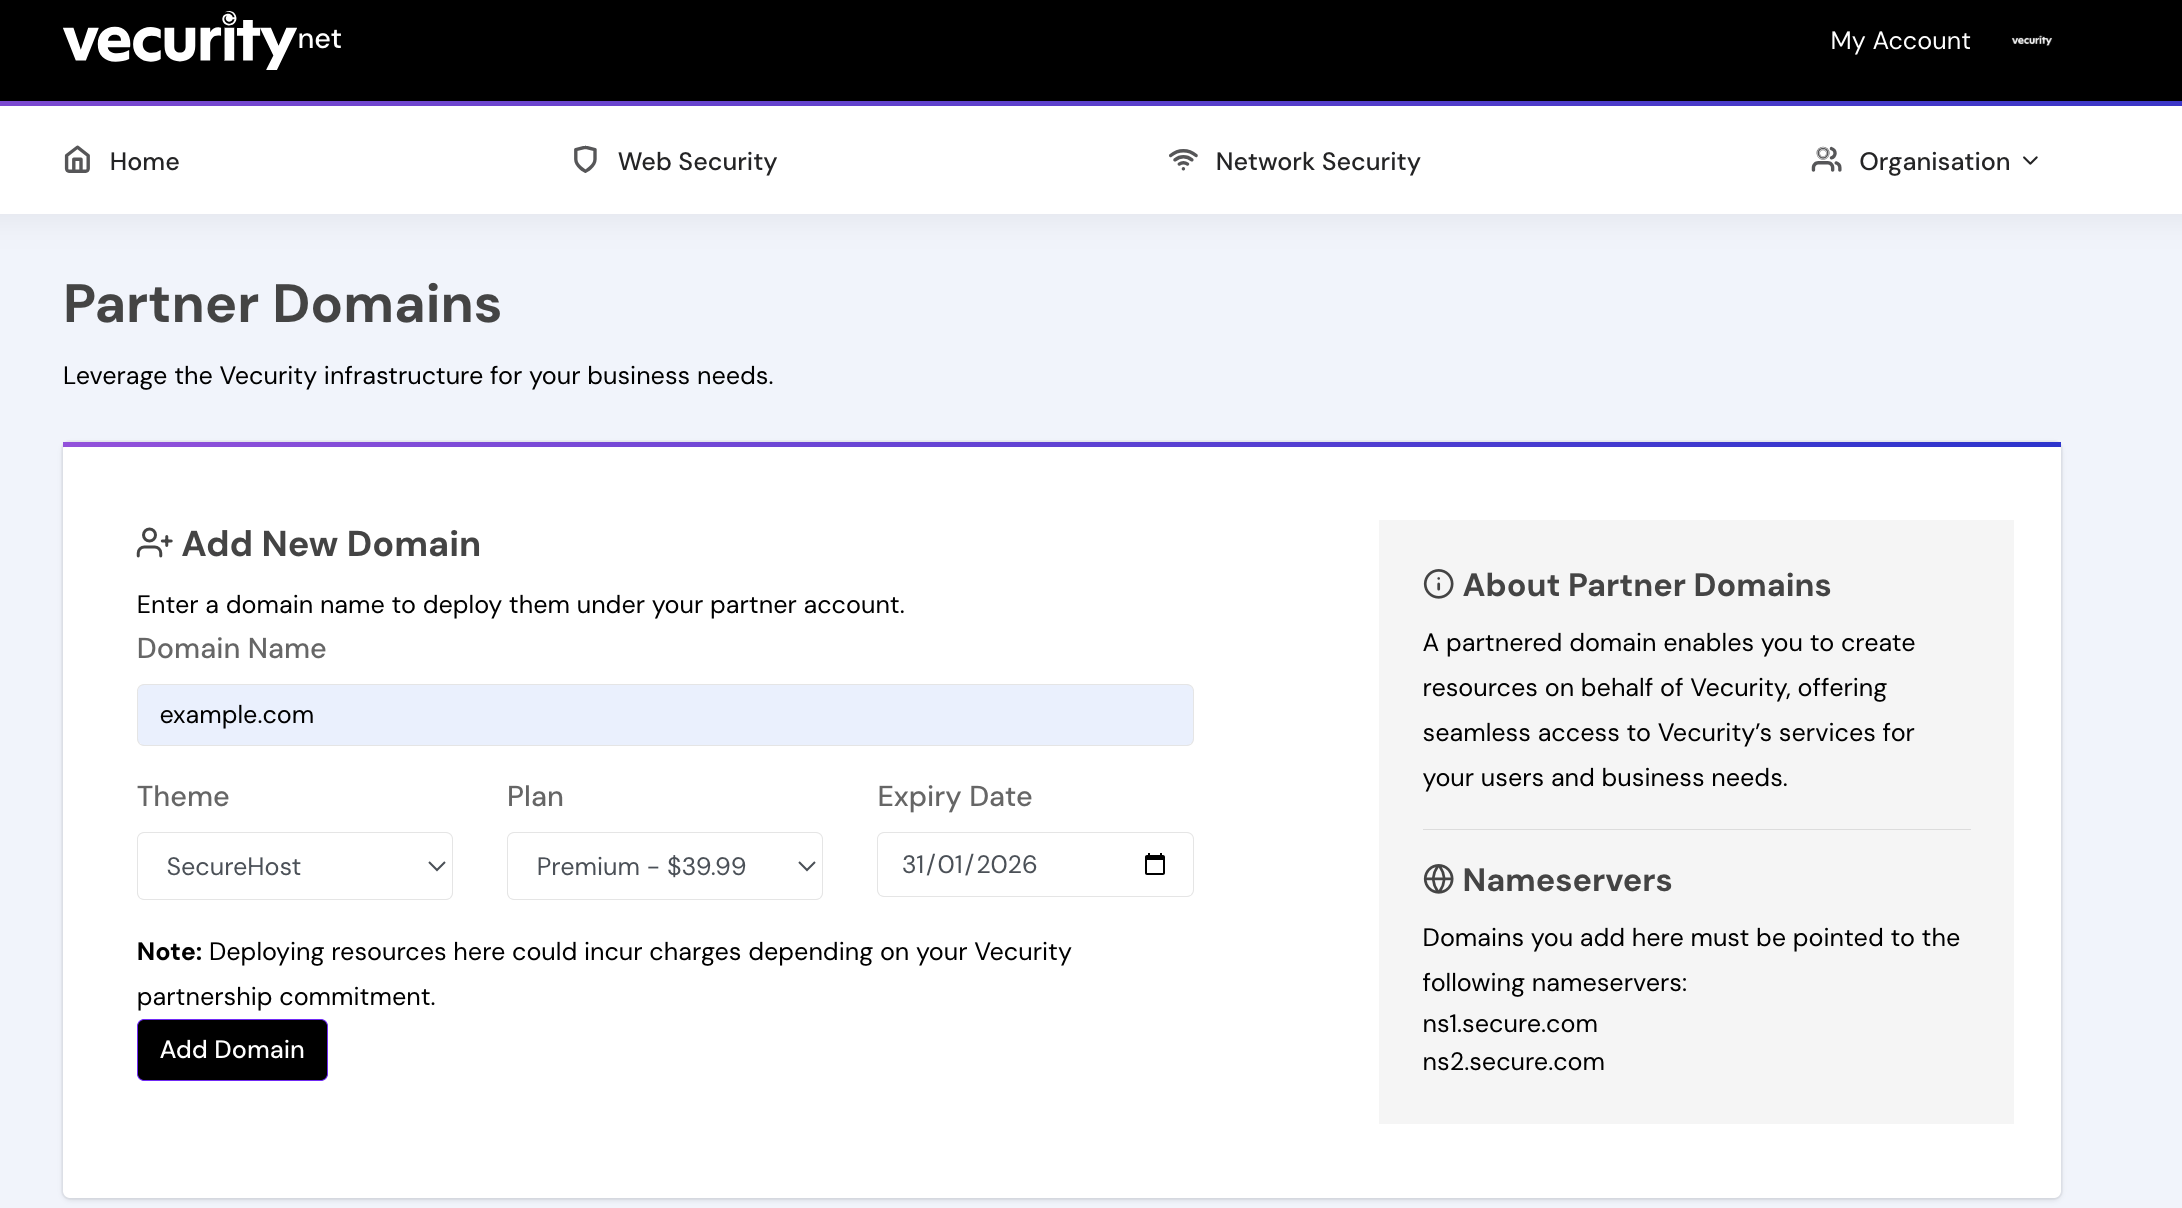
Step 4: Add a Customer
- Go to the Vecurity dashboard and click Add Domain
- Enter the customer domain (e.g., example.com)
- Select the plan, theme, and expiry
Result: The customer will use Vecurity’s infrastructure without ever seeing the Vecurity brand.
Step 5: Instruct Customers to Point Their Domain
Customers must point their domain to your whitelabeled Vecurity setup.
Options:
- Change nameservers to your whitelabeled NS records:
- ns1.secure.com
- ns2.secure.com
- Create a DNS record pointing to the VISE domain:
- Ae3HKHiXxDRwzHSOfq7i2h1dBDTnOQ2a.example.com → dns.secure.com
Use the Verify Domain button in the dashboard to deploy the VISE endpoint and make the domain live.
If active: 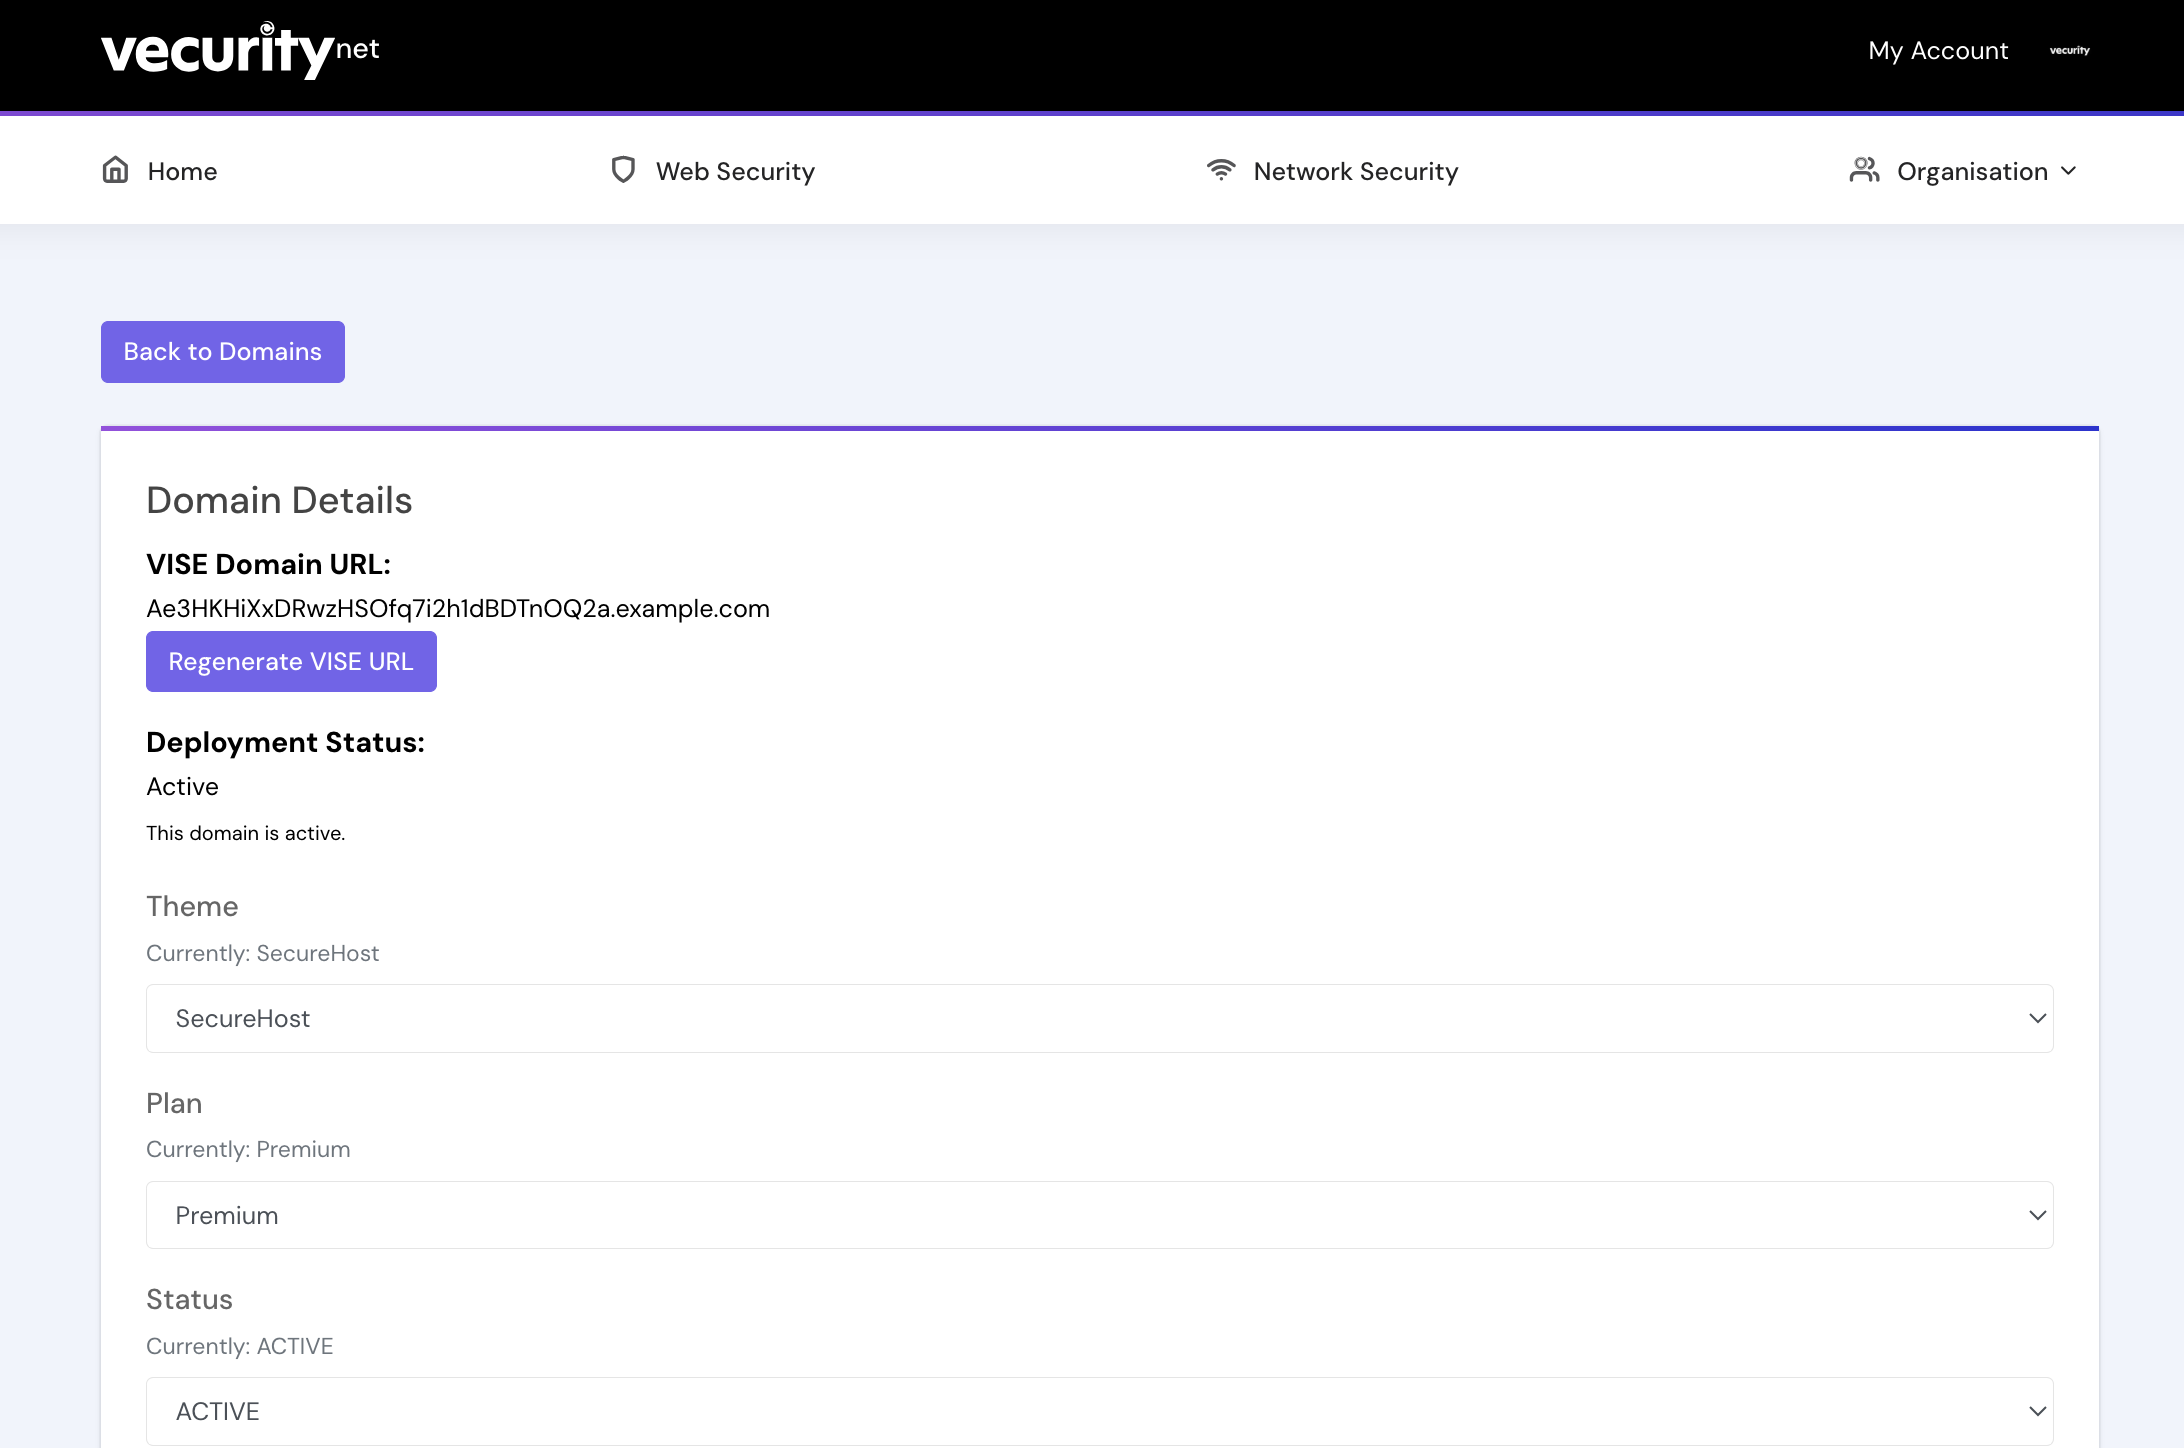
Otherwise, use the Partner API: 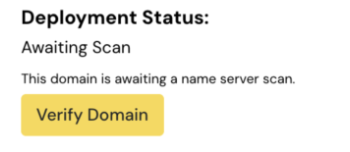
Step 6: Integrate Customer Dashboard
Two options for presenting Vecurity tools to customers:
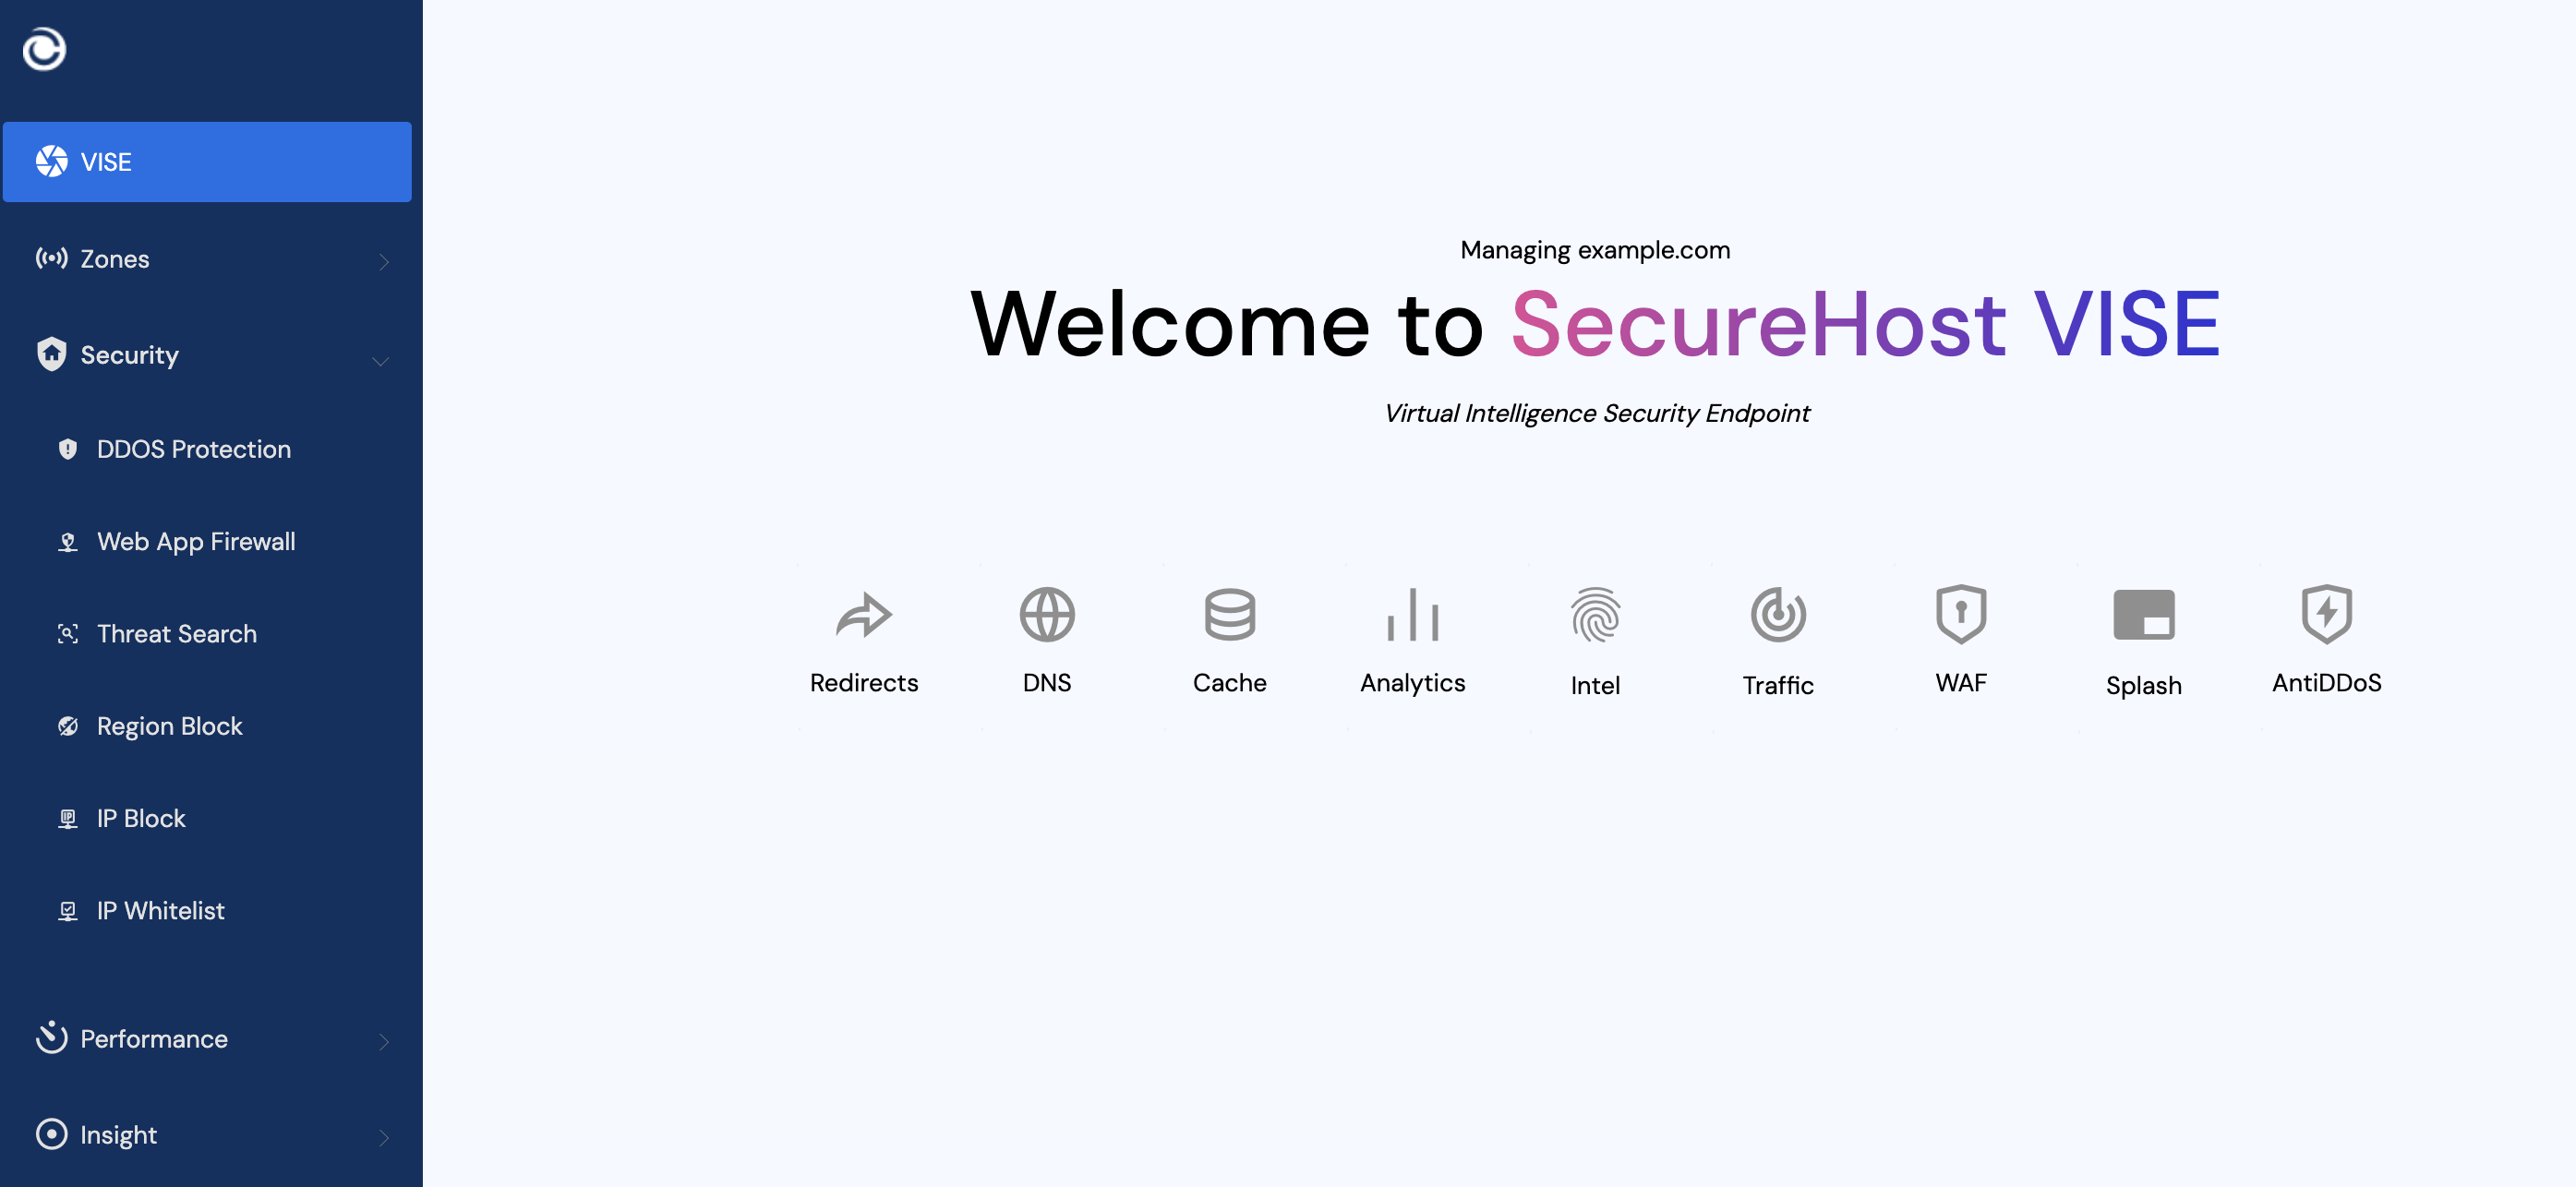
- Iframe Integration (quickest)
- Use the Vecurity Partner API to generate an auth token
- Embed the VISE dashboard as an iframe in your existing app
- Custom Frontend (advanced)
- Build a new frontend connected to Vecurity’s API-first backend
- Provides full control and customization
Once integrated, the customer can access all security tools immediately.
Key Benefits of Vecurity Partnership
- Quick whitelabel setup
- Flexible integration (iframe or custom frontend)
- API-first design allows automation and advanced features
- Customers never see Vecurity branding unless desired
Summary Workflow
- Partner account setup → Submit logo, homepage, payment URL
- Enable partner mode → Vecurity account manager
- Configure whitelabel nameservers → ns1, ns2, dns
- Create a branded theme → Colors, UI
- Add customers → Assign services
- Point customer domain → Nameservers or DNS record
- Integrate dashboard → Iframe or custom frontend